In this article, we are going to show you how to set up your Swivelmate Knee Walker. The Swivelmate offers a tool-free assembly—making the setup process very simple. Setup is so quick and easy that you can be up and scooting around in less than five minutes! If you've purchased the knee walker or had a rental shipped from us , this article will guide you from opening the box to having your knee walker ready for use. Let's begin:
Step 1. Unpack your Swivelmate
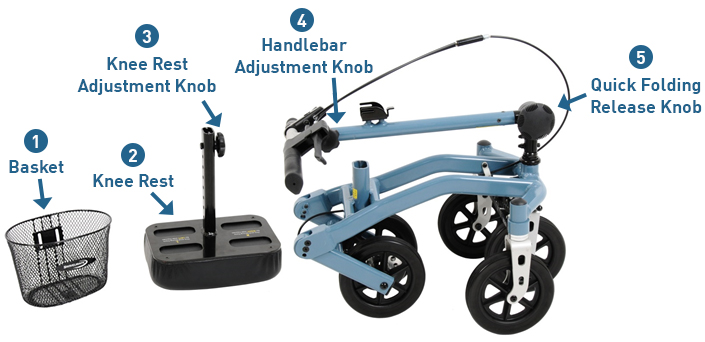
When the knee walker ships to you, it will be in its fully folded position. Take the unit out of the box—make sure that all the parts are included in the shipping box. Here's a diagram to help you check:
Step 2. Unfold The Frame
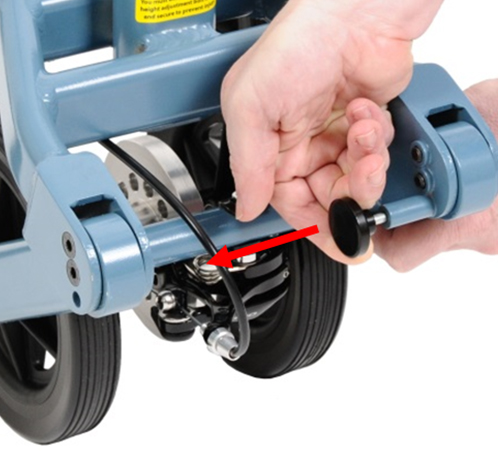
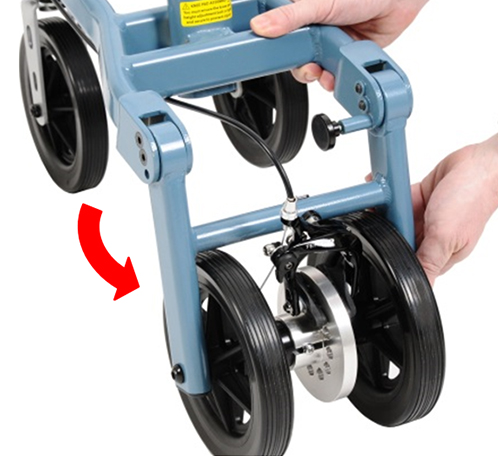
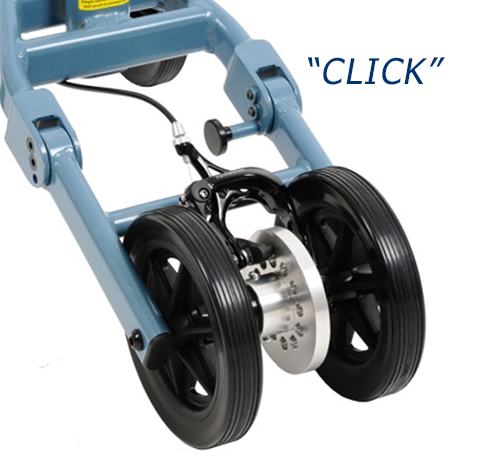
Unfolding the Swivelmate is quick and easy. Having the ability for the Rear Wheel Frame to fold allows it to take less storage space. To unfold the Rear Wheel Frame—pull the black pull-pin, then rotate the frame outwards halfway, then you can release the pull-pin. Continue to unfold the frame until it's fully extended; you'll hear a "click" when the Rear Wheel Frame is secure.
Step 3. Raise The Steering Column
The next step is to unfold the steering column into the upright position. Turn the Quick Folding Release Knob two to three turns until the steering column loosens and can rotate freely. Rotate the column vertically, then tighten the knob to lock the column into place. Make sure the folding mechanism "teeth" interlock.
Step 4. Attach The Knee Rest
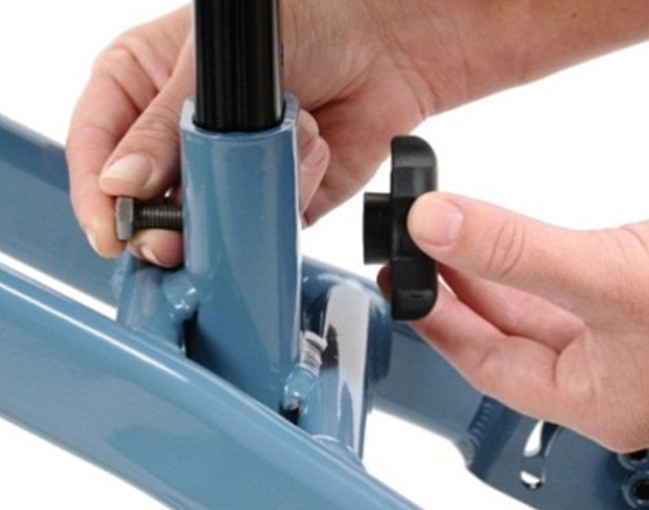
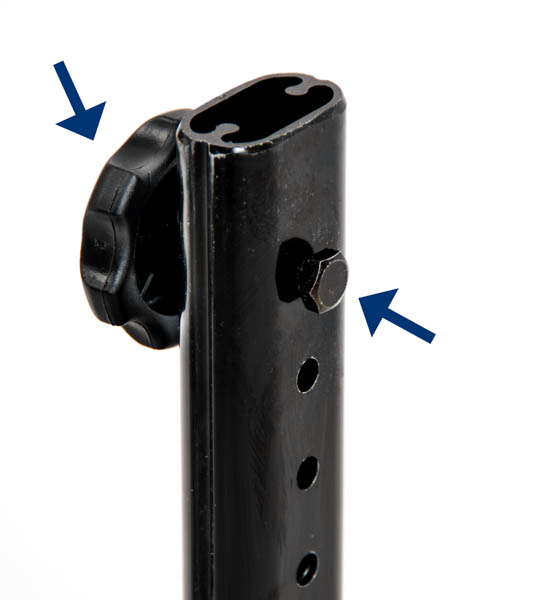
First, remove the Knee Rest Adjustment Knob and bolt from the Knee Rest Post.
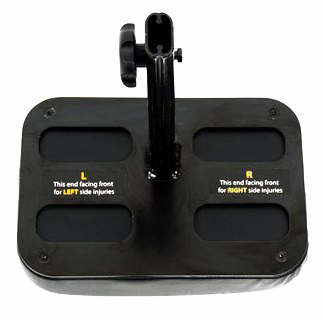
Secondly, we need to adjust the Knee Rest Post to accommodate a left or right leg injury. If you look underneath the Knee Rest Post, you will see labels instructing how to make the adjustment: L side facing forward for left leg injuries—and R side facing forward for right leg injuries.
Once you've determined the injury side, slide in the Knee Rest Post into the Knee Rest Post Holder. But before you add the knob and bolt back in, we need to determine your proper Knee Rest height.
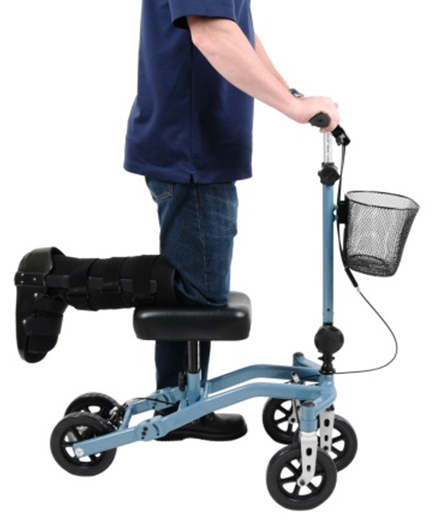
Bend your knee 90 degrees, then move the Knee Rest towards it. The knee rest height needs to be at a level that allows you to stand upright with your knee centered on the pad and your weight comfortably balanced. See illustration below:
Further Reading: How to Measure For Your Knee Walker
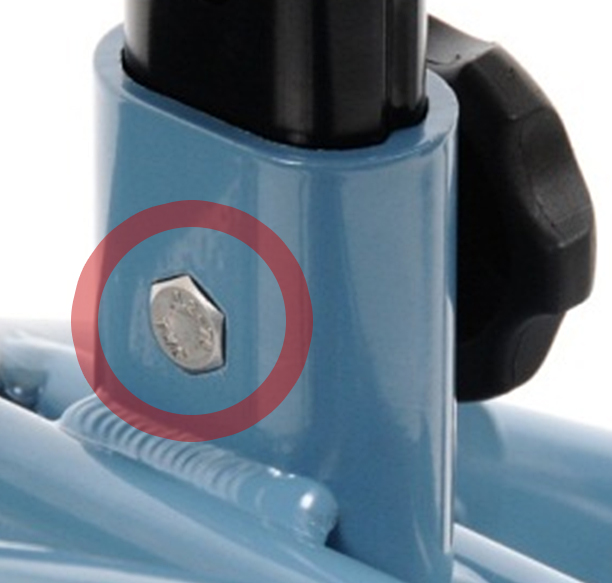
Once you've determined your proper height, insert the bolt into the Post Holder and align the bolt with the Knee Rest Post hole. The bolt head should fit flush into the hex-shaped cutout, just like shown below:
Making sure you have a comfortable fit will provide the safest way to use the knee walker effectively and optimize your comfort.
Step 5. Raise The Handlebars
First, loosen the Handlebar Adjustment Knob and remove the bolt. Raise the handlebar to the height of your waist. You should be able to rest your hands on the handlebar grips in a comfortable natural position.
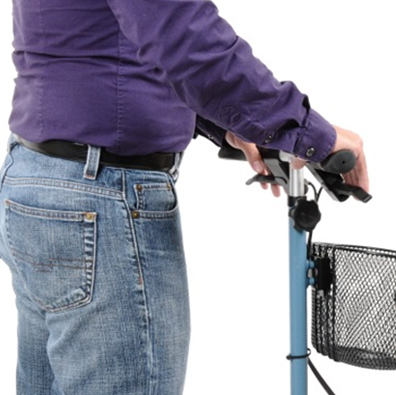
Once you've determined your appropriate handlebar height, insert the bolt and align with the handlebar hole at the desired height. The bold head should fit flush into the hex-shaped cutout, just like shown below.
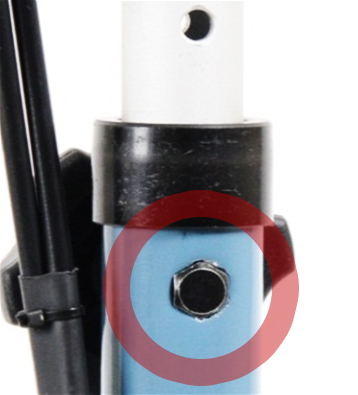
Finally, screw the Handlebar Adjustment Knob onto the bolt until finger-tight.
Step 6. Attach the Wire Basket
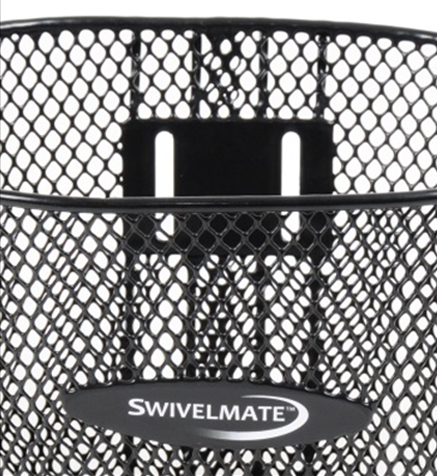
The basket is made of a sturdy mesh and allows you to carry your personal belongings wherever you go with your knee walker. The basket can easily be attached and detached.
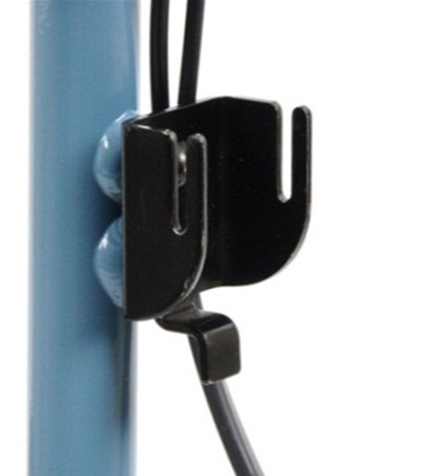
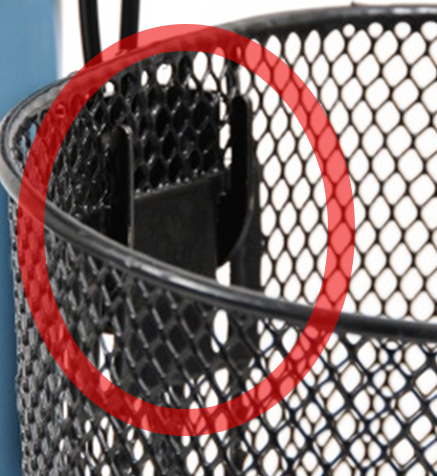
Align the vertical slots in the basket with the bracket on the steering column. Then slide down the basket into the bracket hooks.
Now, your Swivelmate knee walker is all set up! But before you go back to enjoying your mobility freedom, we suggest you read some safety tips on the guide below:
Recommended reading: How to Use a Knee Walker
You can feel confident that the Swivelmate will be an excellent addition to your recovery process—you'll find it to be a trustworthy companion!
|
|
|
| Ready for a Knee Walker? |
|
| I want to... |
|
I want to... |
|
or
|
|
|
Choose this if you'll need it for
6 weeks or less
|
|
Choose this if you'll need it for
more than 6 weeks
|
|
| I already have a knee walker |
|
|
|

 Secondly, we need to adjust the Knee Rest Post to accommodate a left or right leg injury. If you look underneath the Knee Rest Post, you will see labels instructing how to make the adjustment: L side facing forward for left leg injuries—and R side facing forward for right leg injuries.
 Once you've determined the injury side, slide in the Knee Rest Post into the Knee Rest Post Holder. But before you add the knob and bolt back in, we need to determine your proper Knee Rest height.
